

A clean-looking result can still be distorted by contamination. Avoiding experimental artifacts from contaminants starts with cleaning work surfaces and equipment before and after use, separating samples and reagents from amplified products, and interpreting controls alongside the tracer signal. In qPCR, no-template controls should show no amplification; a positive signal can reveal possible contamination and help guide the investigation.
A single unexpected result should not be interpreted in isolation. Patterns across control wells, sample handling, storage, and laboratory workflow can help distinguish a genuine signal from carryover or other contamination. This guide explains how to assess those clues, apply consistent protocols, and document potential contamination to support reproducible evaluation. It covers equipment cleaning, separate storage, control interpretation, and staff practices that support reliable tracer data.
Key Takeaways
- Clean work surfaces and equipment before and after use, and use sterile tools to limit contamination during sample handling.
- Keep samples and reagents in designated pre-PCR areas, separate from PCR products stored in post-PCR areas.
- Use no-template controls to assess unexpected amplification; the pattern across wells can help distinguish reagent contamination from sporadic contamination.
- Standardize staff practices, sample tracking, and contamination records to make results easier to interpret and reproduce.
1. Cleaning and sterilizing laboratory equipment and work surfaces
Cleaning procedures should match the assay and the contaminant being controlled. Before preparation, remove residue from glassware and tools with an appropriate laboratory detergent, then rinse thoroughly with suitable water to prevent detergent carryover. Sterilize tools or use sterile ones for sample handling. Keep cleaned items separate from used equipment and protect them from dust until use.
Clean work surfaces before and after each use. For qPCR areas, 70% ethanol can be used on surfaces and equipment before and after experiments. After spills, a 10-15% sodium hypochlorite bleach solution is recommended for decontamination. Leave it in contact for 10 to 15 minutes, then wipe with de-ionised water. Follow the laboratory’s validated procedure and material compatibility requirements.
Airflow controls also matter. Depending on the laboratory’s purpose, ventilation filters can screen particles as small as 1 micrometer. ISO 14644-compliant environments help control background contamination, while ISO 5 cleanrooms can support sensitive laboratory techniques. These controls complement surface cleaning; they don’t replace careful handling or suitable procedures.
Clean equipment regularly and maintain calibration records. A balance, pipette, or instrument can produce misleading values if residue affects measurements or calibration has drifted. To identify and trace a contaminant, compare affected results with controls, then review cleaning records, equipment use, reagent batches, and sample-handling steps. A shared pattern may point to a common source.
Record the cleaning agent, equipment, date, and any contamination incident in the laboratory log. This creates a traceable preparation history for later data review. For ecotoxicity studies, the Organisation for Economic Co-operation and Development identifies the Daphnia magna reproduction test as Test Guideline 211. Applying documented cleaning and equipment controls supports consistent interpretation of results from this test and other assays.
2. Separate storage for samples, reagents, and PCR products
Storage zones should reflect each method’s contamination pathways. In PCR, amplified products can carry DNA into pre-PCR work, while cell culture is vulnerable to microbial contamination, including Mycoplasma. Keep samples and reagents in pre-PCR areas, and store PCR products in post-PCR areas. This separation reduces the risk of cross-contamination between workflows.
Use clearly labeled containers and designated, color-coded storage areas to prevent mix-ups. Compartmentalized trays keep sample tubes apart, reducing contact, spills, and accidental swaps during handling. Assign each sample a unique identifier and match it to its container, storage location, and experimental record. When the procedure allows, handle samples individually rather than opening several at once.
How should samples, reagents, and equipment be handled to prevent contamination? Use clean, method-appropriate tools, keep containers closed when not in use, and avoid sharing instruments between work areas unless they have been decontaminated. Separate collection, preparation, and analysis steps where practical. Contamination risks vary by sample type: microbes may compromise a cell line, while carryover DNA can affect a nucleic-acid assay.
During collection and transport, use suitable closed containers, clear labels, and a documented handoff. Store each sample under conditions appropriate to its material and assay, and use aliquots when repeated access could expose a stock solution. For cell-line preservation and authentication, vapor-phase liquid-nitrogen storage can support preservation while maintaining traceable sample identity.
Document suspected contamination promptly. Record the sample identifier, storage and handling history, affected experimental results, and any relevant reagent or equipment batch. Compare records across affected samples to identify a shared point in the workflow. This evidence helps distinguish an isolated handling event from a recurring storage or process issue. For research focused on longevity, consistent sample provenance also supports EuroLab Peptides Longevity & Vitality Research.
3. Interpreting amplification in no-template controls
Common contamination artifacts include false amplification, shifted Ct values, and signals that obscure a true experimental response. Microbial contamination or aerosolized DNA templates can skew PCR and qPCR results. Because qPCR can generate millions of DNA copies, opening a reaction tube or plate can release material into the surrounding workspace.
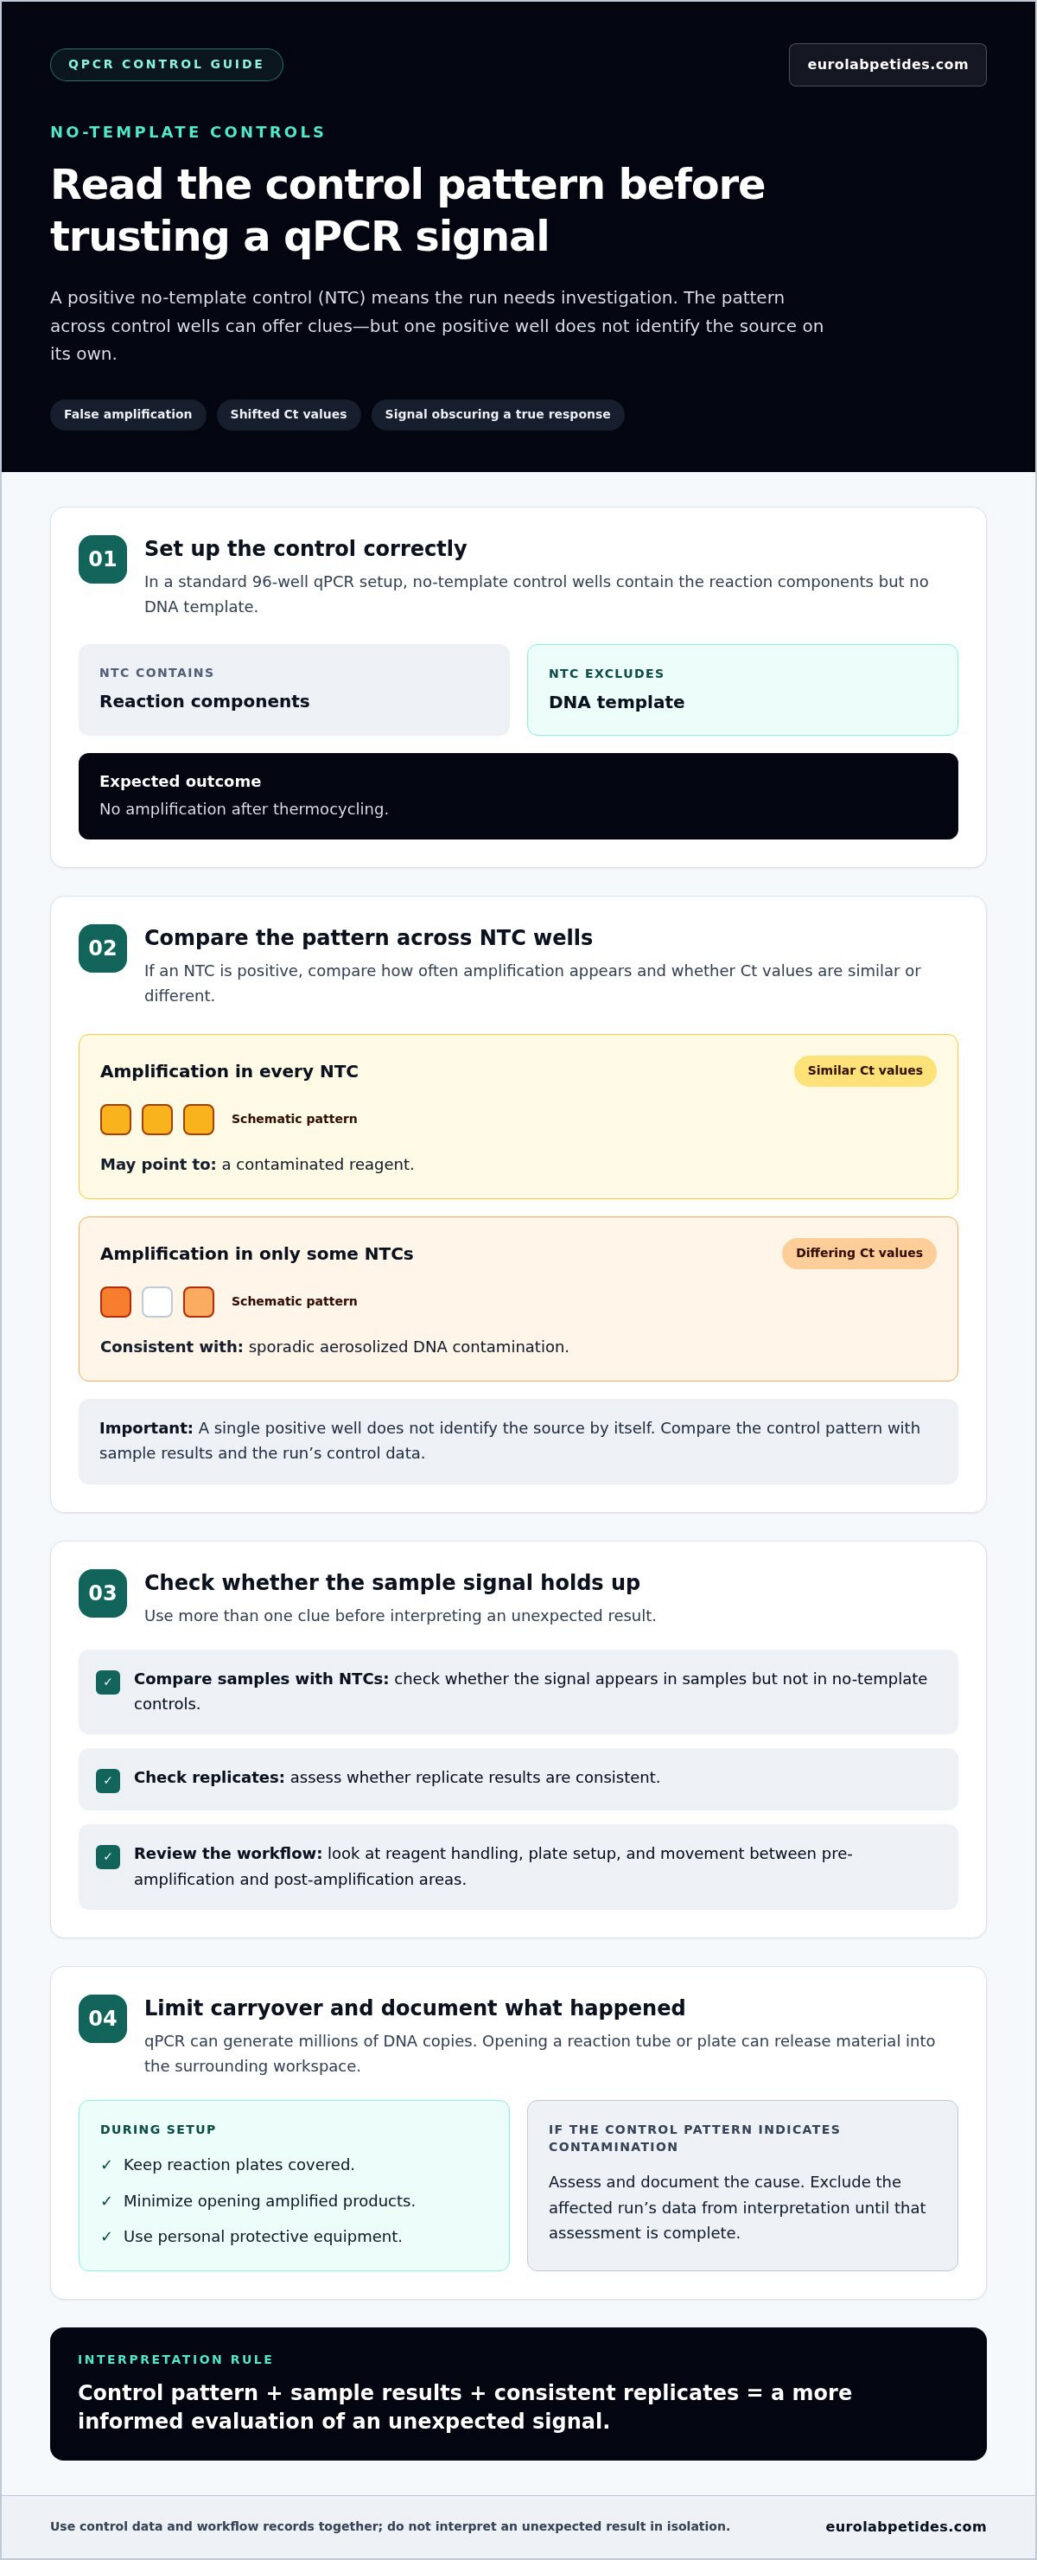
A standard 96-well qPCR setup includes no-template control wells containing the reaction components but no DNA template. These wells should show no amplification after thermocycling. A positive signal means the result requires investigation before sample amplification is interpreted as a true biological signal.
Examine the pattern across control wells. Amplification in every no-template control at a similar Ct value can point to a contaminated reagent. Amplification in only some wells, with differing Ct values, is consistent with sporadic aerosolized DNA contamination. Compare these patterns with sample results and the run’s control data; one positive well does not identify the source on its own.
To distinguish a true signal from an artifact, check whether it appears in samples but not in no-template controls, and whether replicate results are consistent. Review reagent handling, plate setup, and movement between pre-amplification and post-amplification areas. If the control pattern indicates contamination, exclude the affected run’s data from interpretation until the cause has been assessed and documented.
Use proper contamination-control techniques during setup. Keep reaction plates covered, minimize opening amplified products, and use personal protective equipment, including fresh gloves when moving between work areas. Aerosol-resistant tips and dedicated pipettes can reduce transfer during liquid handling. Record affected wells, Ct values, reagent batches, and procedural deviations so later reviews can trace the event rather than treating contaminated results as valid measurements.
Random aerosolized DNA contamination may cause amplification in only some no-template control wells, with different Ct values in each affected well. This uneven pattern is consistent with sporadic contamination rather than a uniform signal across controls.
qPCR amplification can produce millions of copies of a DNA template, which may become airborne when the tube or plate is opened. Treat the control pattern as a reason to investigate possible exposure during handling, not as proof of a specific source.
4. Laboratory protocols and staff training
Written procedures make contamination controls repeatable across staff, shifts, and experiments. Specify how samples move between clean and dirty zones, how pipettes are assigned, and when instruments require decontamination. Use one-way movement from pre-amplification to post-amplification areas, changing gloves and lab coats during transitions. These steps reduce contamination risk and help preserve sample integrity.
Standards and guidance depend on the method. ISO 14644-compliant environments can help control background contamination. The Organisation for Economic Co-operation and Development identifies the Daphnia magna reproduction test as Test Guideline 211, which defines a test method rather than a universal laboratory hygiene protocol.
Train personnel on the written procedures, then use refreshers to reinforce consistent practice. Handwashing with soap and water before and after sample or equipment handling supports hygiene; alcohol-based sanitizer can supplement, but not replace, handwashing. Good personal protective equipment practices can help limit contaminant carryover.
Keep pipettes and other instruments assigned to workstations unless they are appropriately decontaminated before transfer. Use sample barcodes or unique identifiers to connect collection, storage, processing, and analysis records. Training should cover how to log cleaning, sample handling, and suspected contamination incidents, allowing another researcher to reconstruct the workflow and compare affected results.
Review deviations as data, not as informal notes. Record the procedure step, sample identifiers, equipment, and observed control results, then document the corrective action and its effect on analysis. Regular team reviews can surface recurring transfer points and share lessons from failed runs. Consistent procedures are central to avoiding experimental artifacts from contaminants. To connect rigorous handling with research objectives, explore research applications.
Training should cover contamination prevention and established protocols in enough depth to support compliance, with regular refreshers reinforcing expected practices. Physical separation can extend beyond clean and dirty zones: segregate cell culture, DNA analysis, and chemical synthesis, and restrict movement between those areas to limit contaminant transfer.
Hand hygiene is essential around samples, equipment, and potentially contaminated surfaces: wash with soap and water before and after handling. Sanitizer can supplement, but not replace, that practice. Use barcodes or unique identifiers to track each sample throughout the experimental process, and change gloves, lab coats, and safety glasses regularly, discarding them after each use to prevent contaminant carryover.
EuroLab Peptides: Longevity & Vitality Research
EuroLab Peptides offers Longevity & Vitality Research for research programs focused on longevity-related questions. Its research-grade peptides undergo in-house and independent third-party laboratory testing for purity and consistency, providing quality-control information relevant to research planning. This is a natural next step when your experimental focus aligns with longevity and vitality research, and your laboratory has established procedures for sample handling, controls, and contamination review. Related research areas include weight management, tissue repair and recovery, and cognitive function. These offerings support research applications; they don’t replace contamination controls or determine whether a specific experimental signal is valid. To explore Longevity & Vitality Research, visit EuroLab Peptides.
Carry Your Data Into the Next Research Decision
Reliable interpretation is not the endpoint. Use contamination reviews to strengthen future study design: define which control outcomes prompt investigation, assign responsibility for documenting deviations, and incorporate those criteria into routine analysis. This makes avoiding experimental artifacts from contaminants a repeatable quality practice, rather than a response to a single unexpected result.
EuroLab Peptides offers Longevity & Vitality Research, Weight Management Research, and Tissue Repair & Recovery Research for studies in these areas. When your study aligns with one of these fields, these research offerings can be a relevant next step alongside your laboratory’s own validation and contamination-control procedures.
Contact EuroLab Peptides today to explore research options that fit your scientific focus. Continue with clear criteria, traceable decisions, and confidence in the questions your data can support.
Frequently Asked Questions
How to deal with contamination in tracer data evaluation?
Pause interpretation of affected measurements and assess their relationship to controls, sample identity, and run conditions. Compare raw signal traces, replicate agreement, and sample-preparation timing to identify where an unexpected pattern first appears. Document the rationale for retaining or excluding data, and repeat the affected analysis only under a predefined protocol. This keeps decisions traceable and reduces selective interpretation.
What controls and blank samples help detect contamination artifacts?
Use blanks matched to likely contamination points: a reagent blank tests inputs, an extraction blank passes through sample processing, and a field blank can reveal contamination during collection. A no-template control tests amplification reagents without sample DNA, while a positive control shows whether the assay can detect its target. Interpret each control according to its purpose; a clean blank alone does not establish assay performance.
What cleaning, sterilization, and decontamination procedures prevent experimental contamination?
Use a written procedure suited to the assay, surface material, and suspected contaminant. Remove visible residue before applying the designated decontamination method, and follow its required contact and rinsing steps. Keep clean consumables sealed until use and process them separately from used materials. Record the agent, surface or instrument treated, and completion of the procedure so later analysis can connect results with laboratory conditions.
